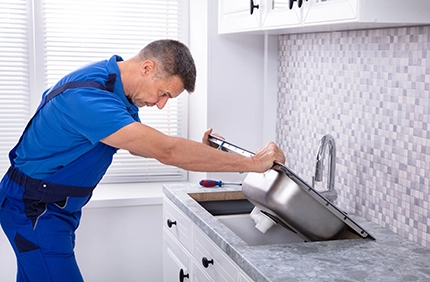
Plumbing a kitchen sink may seem like a daunting task, but with the right tools and knowledge, it can be a straightforward DIY project. Whether you’re replacing an old sink or installing a new one, understanding the plumbing process is essential. This guide will walk you through the steps needed to plumb a kitchen sink effectively, ensuring that your kitchen remains functional and stylish.
Kitchen sink installation components.
Before diving into the installation process, it’s important to grasp the basic components involved in kitchen sink plumbing. A typical kitchen sink setup includes the sink basin, faucet, drain assembly, and supply lines. Having a clear understanding of these parts will help you navigate the installation process more smoothly.
Necessary materials and tools
Before you start plumbing your kitchen sink, gather the necessary materials and tools. Here’s what you’ll need:
Materials: You will need a new kitchen sink, a compatible faucet, a drain assembly (usually included with the sink), plumber’s putty, and Teflon tape for sealing threaded connections.
Tools: Essential tools include an adjustable wrench, pipe wrench, screwdriver, pliers, a bucket to catch any spills, and measuring tape for accurate measurements.

Step-by-Step Guide to Plumb a Kitchen Sink
Prepare the Area
Start by clearing the area under the sink. Remove any items stored there, such as cleaning supplies or pots. Place a bucket under the sink to catch any water that may leak during the process.
Remove the Old Sink (if applicable)
Begin by turning off the water supply. Locate the shut-off valves under the sink and turn them clockwise to stop the water flow. Next, disconnect the supply lines using an adjustable wrench to loosen the nuts connecting the hot and cold water lines to the faucet. After disconnecting, remove the drain assembly by placing the bucket under the trap to catch any water. Use a pipe wrench to loosen the nuts connecting the trap to the drain pipe and the sink drain. Finally, lift the old sink out of its place after removing any clips or brackets securing it.
Install the New Drain Assembly
Prepare the sink by cleaning the area around the drain hole. Apply plumber’s putty around the drain hole, rolling it into a rope shape and pressing it into place. Insert the drain through the hole from underneath the sink, ensuring it fits snugly against the putty. Place the locknut onto the drain from underneath and tighten it by hand, giving it a slight turn with pliers without overtightening.
Position the Sink
Carefully lower the new kitchen sink into the countertop cutout, ensuring it sits flat and level. If your sink has mounting clips, attach them according to the manufacturer’s instructions, tightening them evenly to prevent shifting.
Install the Faucet
Locate the designated hole on the sink for the faucet and place it through this hole. Underneath the sink, place a washer over the faucet’s mounting post and screw on the mounting nut. Tighten it with your hand, and use a wrench for a final snug fit, being cautious not to damage the finish. Next, attach the hot and cold water supply lines to the corresponding sides of the faucet, using Teflon tape on the threads to ensure a tight seal.
Connect the Supply Lines
Ensure the shut-off valves are still turned off. Connect the supply lines from the wall to the corresponding hot and cold connections on the faucet. Tighten the nuts with your adjustable wrench, ensuring a secure fit without overtightening.
Install the Trap
Position the trap under the sink, aligning it with the drain assembly. Slide the trap onto the drain pipe and secure it with the provided nuts. Ensure the trap has a slight downward slope toward the drain to facilitate drainage, adjusting as necessary. Tighten all connections with your pipe wrench, ensuring a snug fit.
Test for Leaks
Slowly turn on the shut-off valves under the sink to restore water flow. Inspect all connections for leaks—around the faucet, supply lines, and drain assembly. If you see any leaks, turn off the water and tighten the connections as needed. Run water through the sink for a few minutes while observing for any signs of leaks.
Final Adjustments
After ensuring there are no leaks, make any final adjustments to the faucet and drain assembly. Running water through the sink for a few minutes will ensure everything is functioning properly.
Conclusion
Plumbing a kitchen sink is a manageable task that can enhance your kitchen’s functionality. By following these detailed steps and understanding the components involved, you can successfully install a new sink and faucet. Remember, the key to a successful plumbing project lies in preparation and attention to detail. With the right approach, your kitchen sink will serve you well for years to come.
If you want to continue learning information like this about DIY, we invite you to read our article on potable water where you will learn more about the subject and see everything from a broader point of view.


0 Comments