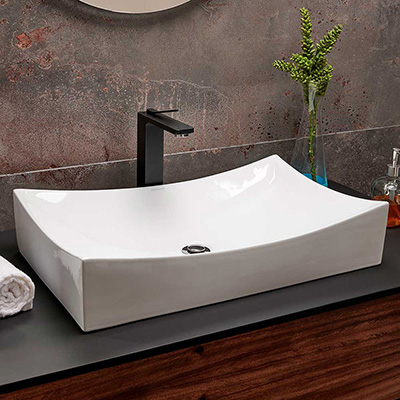
Installing a bathroom sink can be a rewarding DIY project that not only enhances the functionality of your bathroom but also adds to its aesthetic appeal. Whether you’re replacing an old sink or installing a new one, understanding the steps involved can make the process smoother. In this article, we will guide you through the installation of a bathroom sink, discussing both technical and practical aspects of plumbing.
Tools and Materials Needed to Install Bathroom Sink
Before diving into the installation, it’s essential to gather all necessary tools and materials. Here’s a list of what you’ll need:
Tools
- Adjustable wrench
- Screwdriver (flathead and Phillips)
- Plumber’s putty
- Pipe cutter
- Level
- Measuring tape
Materials
- New bathroom sink
- Sink drain assembly
- Water supply lines
- Mounting hardware (if applicable)
- Silicone caulk
Having these items ready will streamline your installation process and minimize interruptions.
Preparing for installation
The first step in installing a bathroom sink is to prepare the area. If you’re replacing an existing sink, turn off the water supply and disconnect the plumbing. Use your adjustable wrench to loosen the nuts connecting the water supply lines and the drain. Once everything is disconnected, remove the old sink.
If you’re installing a new bathroom sink, ensure that the vanity or countertop is ready to accommodate the new fixture. Measure the space to confirm that the new sink will fit properly. This step is crucial to avoid any surprises during installation.

Understanding Sink Types
Bathroom sinks come in several types, each with unique installation requirements and aesthetic appeal. One of the most common types is the drop-in sink, which is designed to sit on top of the countertop. This makes installation relatively easy, requiring only a simple cutout in the countertop. The drop-in sink is popular due to its simple installation and the wide variety of styles available, allowing homeowners to choose one that fits their bathroom décor.
Another common choice is the undermount sink, which is installed beneath the countertop for a seamless look. This type requires a precise cutout in the countertop and often needs additional support to hold its weight. While installation may be more complex, the aesthetic appeal is significant, allowing for easier cleaning of the countertop surface. Wall-mount sinks are also a great option for smaller bathrooms, as they attach directly to the wall, freeing up floor space. Finally, pedestal sinks offer a classic design, combining a sink and pedestal, and are often used in traditional settings. Each type has its advantages, so understanding these options is crucial to making the right choice for your bathroom.
Installing the Bathroom Sink
Step 1: For drop-in sinks, apply a bead of silicone caulk around the edge of the sink opening on the countertop. Carefully place the sink into the cutout, ensuring it sits evenly. Use a level to check that it’s straight. If you’re installing an undermount sink, follow the manufacturer’s instructions for securing it to the countertop.
Step 2: Once the sink is in place, it’s time to install the drain assembly. Begin by inserting the drain into the sink hole. Apply plumber’s putty around the edge of the drain to create a watertight seal. From underneath, secure the drain with the provided mounting hardware. Ensure it’s tight but avoid over-tightening, which can crack the sink.
Step 3: Next, connect the water supply lines to the faucet. If your bathroom sink has a single faucet, connect the hot and cold water lines to their respective inlets. For a double faucet setup, ensure that each line is connected correctly. Tighten the connections with your adjustable wrench, but again, be cautious not to overtighten.
Step 4: After everything is connected, turn on the water supply slowly. Check for leaks around the drain and the water supply lines. If you notice any leaks, tighten the connections as necessary. It’s vital to ensure everything is sealed properly to avoid future plumbing issues.
Final Touches
Once you’ve confirmed that there are no leaks, it’s time to finish up. Apply a bead of silicone caulk around the edge of the sink to seal it against water damage. This step is especially important for drop-in sinks, as it helps prevent water from seeping beneath the sink.
After the caulk has cured (usually 24 hours), you can reattach any plumbing fixtures, such as the faucet handles, and ensure everything is functioning correctly.
Conclusion
Installing a bathroom sink may seem daunting, but with the right tools, materials, and knowledge, it can be a straightforward process. By understanding the different types of sinks and following the steps outlined in this guide, you can successfully install a bathroom sink that meets your needs. Remember, proper installation and maintenance are key to enjoying your new bathroom fixture for years to come. Don’t hesitate to reach out to a professional if you encounter any challenges during the installation process. Happy plumbing!
If you found our article useful, we invite you to continue learning about plumbing in our article on potable water, where we go into more depth on equally essential topics in plumbing that can be very helpful to you.


0 Comments