Learning how to solder a copper pipe is an essential skill for anyone involved in plumbing or DIY projects. Copper pipes are flexible, bacteria-resistant, and environmentally friendly as they can be recycled. This guide will provide you with complete instructions on how to solder a copper pipe effectively, ensuring there are no leaks in your home.
What is Soldering?
Soldering is a technique used to join two pieces of metal, such as copper pipes, using a filler metal known as solder. Unlike soldering, where both pieces of metal are melted together, soldering involves melting only the solder, which then flows into the joint between the two pieces of copper.
Traditionally, solder was made from lead, but due to health concerns, modern solder is usually an alloy of tin and copper. This lead-free solder is safe for use in plumbing applications.
Safety Tip: Never use lead solder on copper pipes that carry drinking water. If you can avoid it, don’t use lead solder.
Tools and materials for soldering a copper pipe
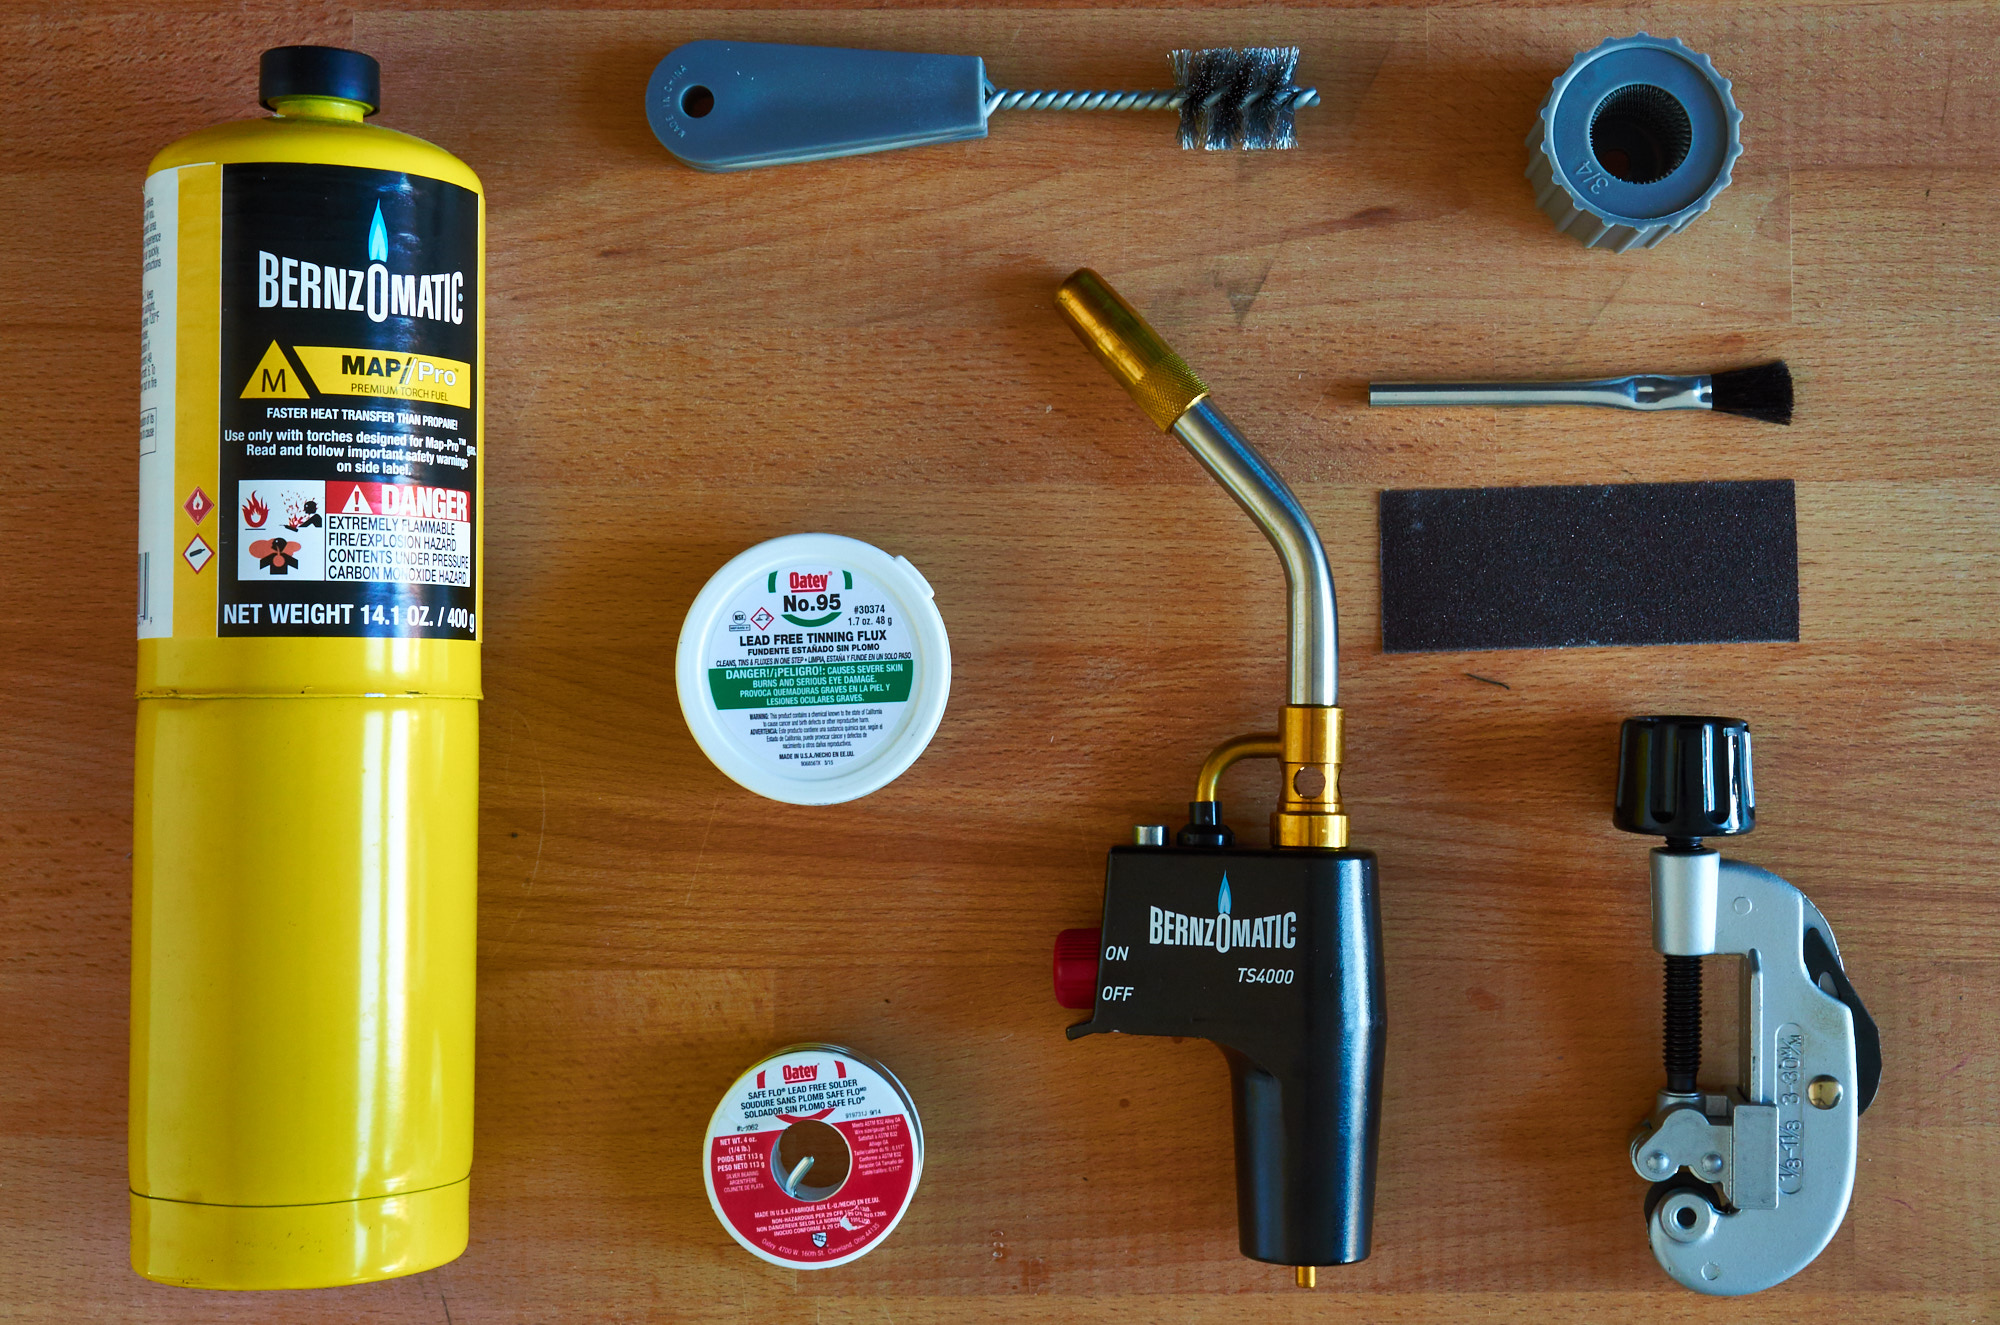
To successfully solder copper pipe, you will need specific tools and safety equipment. Here is a detailed list:
Essential Tools
- Soldering Torch – A propane torch is commonly used to solder copper pipe. MAPP gas torches can also be used as they burn hotter.
- Deburring Tool – This tool removes small metal burrs and irregularities from the edges of the pipe.
- Wire Brush – Important for cleaning the inside of fittings and ensuring a good joint.
- Pipe Cutter – For cutting copper pipe to the desired length.
- Sanding Cloth – Used to smooth out rough edges on pipes.
- Flux – A paste that helps solder flow and protects the joint from oxidation.
- Solder – Usually comes on a spool; this is the metal that will melt and fill the joint.
Safety Equipment
- Safety glasses – protect your eyes from any welding sparks or spatter.
- Heat-resistant gloves – protect your hands from the heat while you work.
- Fire extinguisher – always keep one nearby in case of emergency.
- Ventilation – make sure you work in a well-ventilated area to avoid inhaling fumes.
Now that you have gathered your materials, you can begin practicing soldering techniques.
Tools ands materials
Preparing the Pipe and Fittings
Preparation is key to learning how to solder copper pipe. If you’re working on a pipe that’s part of an active water line, make sure the water is turned off and drained. The pipe should be dry before soldering.
Preparation Steps
- Cut the Pipe: Use the pipe cutter to cut the copper pipe to the desired length. Make sure the cut is straight for a better fit.
- Clean the Pipe: Use a deburring tool to remove any burrs from the edges of the pipe. This step is vital as burrs can prevent a perfect fit.
- Clean the Fittings: Use a wire brush to clean the inside of the fittings and the outside of the pipe. Make sure there are no contaminants such as dirt or grease.
- Apply Flux: Coat the cleaned areas with flux, which helps the solder flow and prevents oxidation during the heating process.
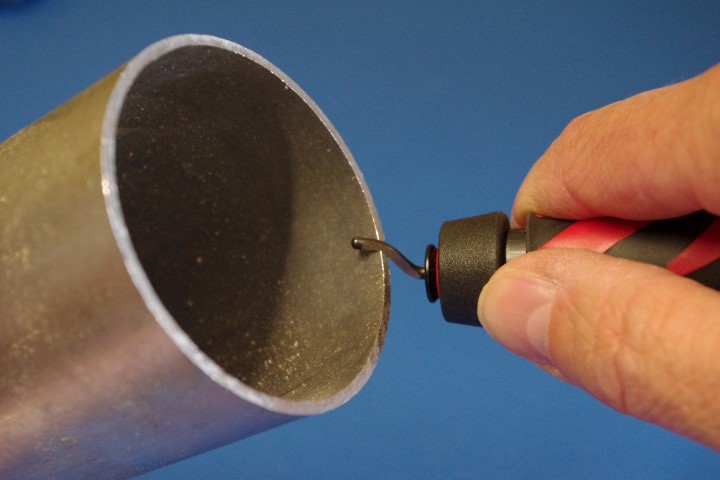
Clean the edge of the pipe
Heating the Fitting
Once your workspace is ready, it’s time to apply heat:
- Light the Torch: Turn on the torch and adjust the flame to a moderate size.
- Heat the Fitting: Hold the flame against the center of the fitting for about 4 to 5 seconds or until the flux begins to sizzle.
- Make Sure the Heat is Distributed Evenly: Heat the opposite side of the fitting to make sure the heat is distributed evenly. This will help the solder flow more effectively into the joint.
Applying Solder
When the fitting is hot enough, it’s time to solder a copper pipe:
- Touch the Solder: Bring the solder wire close to the joint where the pipe meets the fitting. If the solder melts and flows into the joint, you are successful.
- Allow the Solder to Flow: Let the solder flow around the joint, ensuring it fills any gaps. A good solder joint should have a smooth, shiny appearance.
- Check for Adequate Amount: Typically, you want to use about 1/2 to 3/4 inch of solder for a standard joint.

Clean Up
Once the solder has cooled, it’s important to clean the joint:
- Wipe Away Excess Flux: Use a clean rag to remove any excess flux, which can cause corrosion if left on the joint.
- Inspect the Joint: After cleaning, inspect the joint for any leaks by turning the water back on.
- Re-solder if Necessary: If you notice any leaks, you may need to disassemble the joint and re-solder it.

Troubleshooting Common Issues
If you discover leaks after soldering, the joint may not have been heated sufficiently or the solder may not have flowed properly. In such cases, you may need to reheat the joint and add more solder.
If you also discover that there is not enough solder in the joint, you can reheat the area and apply additional solder until the joint is adequately filled.
Finally, if the joint appears dull or has a white powdery substance, it may be due to oxidation. This can be avoided by making sure the surfaces are clean and using flux.
Conclusion
Mastering how to solder a copper pipe is a valuable skill that enhances your plumbing abilities. With practice and attention to detail, you can create strong, leak-proof connections in your home plumbing systems. Remember to follow safety precautions and take your time during each step for the best results. Whether you’re working on a plumbing project or a DIY home improvement task, knowing how to solder a copper pipe will serve you well.


0 Comments