Installing a sump pump is an essential task for homeowners looking to protect their basements from flooding and water damage. A sump pump is a device that removes water accumulated in a sump, typically located in the basement or crawl space of a home. This article will guide you through the installation process, discussing its importance, the tools required, and some technical aspects to ensure proper operation.
Understanding the Importance of a Sump Pump
A sump pump is crucial for any home prone to flooding or water accumulation. It helps prevent water damage, mold growth, and structural issues that can arise from prolonged exposure to moisture. By removing excess water from areas where it can accumulate, a sump pump protects your home’s foundation and keeps your living space dry and healthy. Moreover, many insurance companies offer discounts on premiums for homes equipped with sump pumps, recognizing their role in mitigating water damage risks.
Tools and materials needed to install the sump pump
Before you begin the installation process, gather the necessary tools and materials:
- Sump Pump Kit: Choose a reliable sump pump that fits your needs, whether it’s a submersible or pedestal model.
- Sump Basin: A durable basin to house the sump pump.
- PVC Pipe and Fittings: For drainage and venting.
- Check Valve: To prevent backflow of water into the sump.
- Power Drill: For making holes and securing the pump.
- Level: To ensure the pump is installed correctly.
- Tape Measure: For accurate measurements.
- Safety Gear: Gloves and goggles for protection.

Step by step installation guide
Step 1: Choose the Right Location
Select a suitable location for your sump pump. Ideally, it should be in the lowest part of your basement or crawlspace, where water tends to accumulate. Ensure that the area is easily accessible for maintenance and that there is a nearby electrical outlet. If possible, avoid placing the pump near any appliances that may leak, as this could lead to additional water entering the sump basin.
Step 2: Prepare the Sump Basin
Once you’ve chosen the location, dig a hole for the sump basin. The hole should be about 24 inches deep and 18 inches in diameter, allowing enough space for the basin and the sump pump. Use a shovel or post-hole digger to create a clean, round hole. Ensure the bottom of the hole is level by using a level tool. This is crucial to prevent the pump from tipping and to ensure it operates efficiently.
Step 3: Install the Sump Basin
Place the sump basin into the hole and make sure it sits level with the surrounding floor. If necessary, add gravel around the basin to provide stability and improve drainage. The top of the basin should be flush with the floor to prevent tripping hazards and allow for easy access. Leave enough space at the top of the basin for the sump pump and any additional fittings.
Step 4: Connect the Sump Pump
Once the basin is securely in place, it’s time to install the sump pump. Follow the manufacturer’s instructions to connect the pump to the discharge pipe. Typically, this involves inserting the pump into the basin and securing it with screws or brackets if provided. Ensure that the pump is positioned correctly within the basin to allow for optimal water flow. The float switch, which activates the pump, should be free to move up and down without obstruction.
Step 5: Install the Discharge Pipe
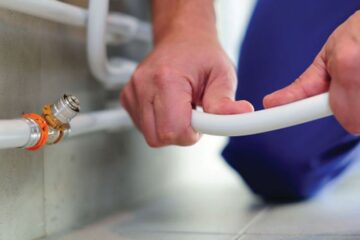
Next, install the discharge pipe that will carry water away from your home. Use PVC pipe and fittings to create a direct route from the sump pump to the outside of your home. Measure and cut the PVC pipe to the required lengths, ensuring that the pipe slopes downward away from the foundation to facilitate proper drainage. Use PVC cement to secure the joints and ensure there are no leaks. Be sure to include a check valve in the discharge line; this valve allows water to flow out while preventing it from flowing back into the sump basin.
Step 6: Create a Ventilation System
To prevent pressure buildup in the discharge pipe, it’s essential to create a ventilation system. Install a vent pipe that allows air to escape, reducing the risk of pipe bursts or backups. The vent pipe should be connected to the discharge line and extend above the flood level of the property. This will help maintain proper airflow and ensure the sump pump operates effectively.
Step 7: Connect to Power
Since most sump pumps require electricity to operate, connect the pump to a nearby electrical outlet. Ensure that the outlet is GFCI (Ground Fault Circuit Interrupter) protected to prevent electrical hazards in case of water exposure. If the outlet is not GFCI, consider hiring a licensed electrician to install one. Make sure the power cord is long enough to reach the outlet without being stretched or pinched.
Step 8: Test the System
After everything is installed, it’s time to test your sump pump. Pour water into the sump basin to see if the pump activates and drains the water effectively. Start with a bucket of water and slowly pour it into the basin. Observe whether the float switch rises and triggers the pump. Check for any leaks in the discharge pipe and ensure that the check valve is functioning correctly by observing that water does not flow back into the basin once the pump has finished its cycle.
Step 9: Regular Maintenance
Once your sump pump is installed, regular maintenance is crucial for its performance. Inspect the pump every few months to ensure it’s free of debris and functioning correctly. Test the pump by pouring water into the basin periodically to confirm it activates. Additionally, clean the discharge pipe to prevent clogs and ensure proper water flow. Removing any debris from the basin and ensuring the float switch is unobstructed will help maintain optimal performance.
Conclusion
Installing a sump pump is a valuable investment for homeowners looking to safeguard their property from water damage. By following the steps outlined in this guide, you can achieve a successful installation that will protect your basement and maintain a dry, healthy living environment. Regular maintenance and knowledge of performance will ensure it operates efficiently for years to come. Protect your home with proper installation and enjoy peace of mind during heavy rains or flooding.
If you liked this article and found it useful and want to continue learning more valuable information about plumbing, I invite you to read our next article on rainwater.

0 Comments